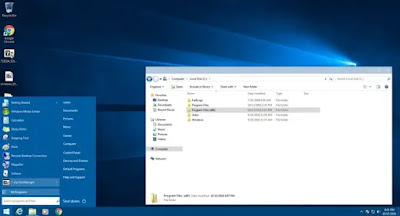
Windows 10 has many new features in terms of both aesthetics and functionality. More importantly, Windows 10 has the new and improved Start Menu,Action Center, better notifications management, etc. As good as it is, some users may not want to shift to Windows 10, because of low end PC, Low Ram to run and enjoy Windows 10.However, you can still make your Windows 7 look and feel like Windows 10 . In this guide i will show you how you can install windows 10 theme in windows 7. this guide works for both 32bit and 64bit versions of Windows 7.
Get and Install Windows 10 Theme for Windows 7
- To make Windows 7 look like Window 10, you need to download some tools. Below is the list of tools, please download.
All these Tools are in "Zip Format", you need to install WinRar to Extract Zip File download it here
Transform Windows 7 into Windows 10
Once you have all these required tools downloaded, now we move on to next step. first extract Universal Theme Patcher.Zip using WinRar. open extracted file folder, there are two Exe files in that Folder, one is for 32-bit Windows and the other one is for 64-bit Windows.Open Universal Theme Patcher.exe 32bit or 64bit according to your Windows version.
- When you will open Universal Theme Patcher, it will ask you to patch some files, Click on 'Yes' and move on to next step.
- The above action will take you to patch screen,in this windows just click on 'Patch' button next to all dll files.
- Now Extract 'Theme Resource Changer.Zip' file using WinRar.open extracted file folder, there are two Exe files in that folder x86 for 32-bit windows and x64 for 64-bit windows.open Theme Resource Changer.exe according to your windows version.
- installation wizard windows will open, just follow on-screen instructions and install it like any other software.
- After installing Theme Resource Changer, Restart your Computer
- After restarting your pc, extract Windows 10 Theme for Windows 7.zip , open extracted file folder and execute 'RunMeFirst.cmd'.
- When you execute RunmeFirst.cmd File it will change the extension of files in that folder to zip file.
- Now extract 'Windows_10_Themes.7z' using winRar ,
- then goto that extracted folder, open 'Default Taskbar With Start Menu User Picture' Folder, Copy all Theme Files from this Folder.
- Paste all copied theme files in this location. C:\Windows\Resources\Themes\ , you may be ask for admin rights. simply click on 'Continue' to copy files.
- When you done copying these files, you can apply Windows 10 themes, to do so, Right click anywhere on the desktop and then goto 'Personalize'.
- Choose your Favourite Windows 10 theme and Apply it on your windows 7.
- Now to remove transparency from Themes,extract 'Windows 7 Aero Blur Tweaker.zip' using winRar, then goto extracted file folder and open Windows 7 Aero Blur Tweaker.exe
- A pop-up Windows Will Open, Simply Click on 'Hide Blur' , and you are done.
Congratulations You’ve successfully installed the Windows 10 theme.


Post a Comment